With growing interest in sustainable gardening and food waste recycling, many homeowners are asking: is vermicomposting really worth the investment? This comprehensive guide explores the costs, benefits, and practical aspects of worm composting to help you make an informed decision about starting your own vermiculture system.
Ready to transform your kitchen scraps into garden gold? Keep reading to discover everything you need to know about setting up your first worm bin and maximizing your vermicomposting success.
What makes vermicomposting a game-changer for home gardeners

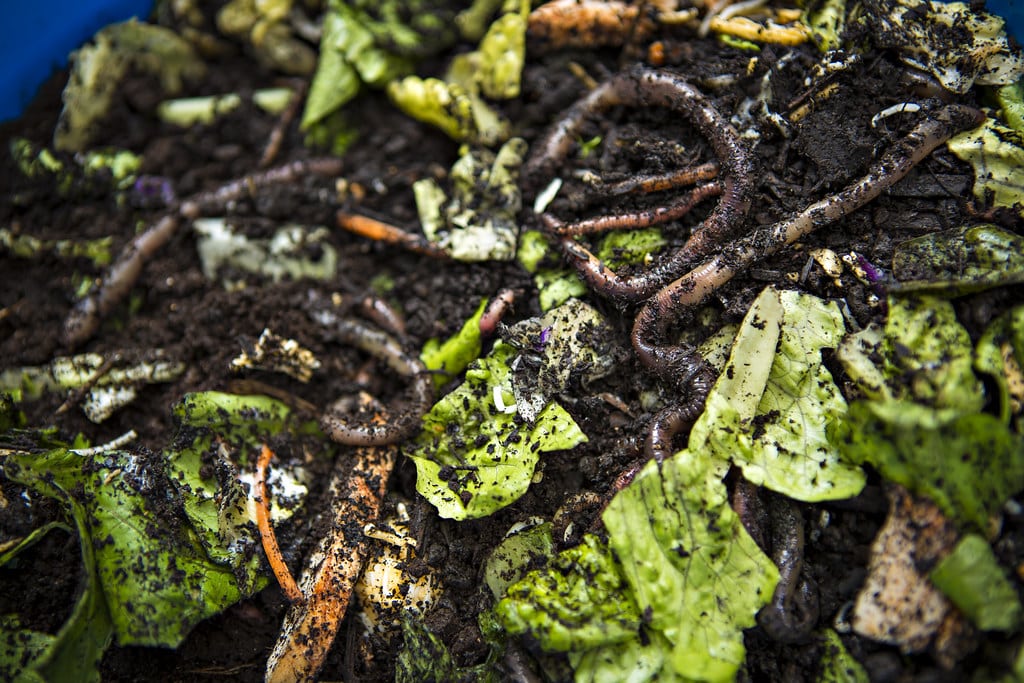
Vermicomposting stands out as one of the most efficient methods for converting organic waste into premium soil amendment. Unlike traditional composting, this process uses red wiggler worms to break down food scraps, creating nutrient-rich worm castings that serve as an exceptional organic fertilizer. The system works year-round, requires minimal space, and produces both liquid fertilizer and solid compost perfect for urban farming applications.
Vermicomposting benefits that make It worth every penny
The advantages of vermicomposting extend far beyond simple waste reduction. Here’s what makes this sustainable gardening practice so valuable:
- Superior soil amendment: Worm castings contain 5-11 times more nitrogen, phosphorus, and potassium than regular soil
- Odor-free operation: Properly maintained vermicomposting systems produce no unpleasant smells
- Space efficiency: Perfect for apartments and small spaces where traditional composting isn’t feasible
- Year-round production: Unlike outdoor compost bins, worm bins work continuously regardless of weather
- Liquid fertilizer bonus: Worm tea provides an excellent organic liquid fertilizer for plants
How to start vermicomposting at home: essential setup requirements

Starting your vermicomposting journey requires minimal investment and basic supplies. The initial setup typically costs between $50-150, depending on whether you build or buy your compost bin system.
Materials needed:
- Large plastic storage container (18-gallon minimum, opaque)
- Smaller container that fits inside (for drainage)
- Power drill with 1/8″ and 1/4″ drill bits
- Red wiggler worms (1 pound serves 2-4 people)
- Bedding materials (shredded newspaper, cardboard, or coconut coir)
- Spray bottle for moisture control
- pH testing strips (optional but recommended)
Step 1: Prepare your containers
Main bin preparation:
- Choose a large opaque plastic container
- Drill 20-25 holes using a 1/8″ bit around the sides, 1-2 inches from the top for ventilation
- Drill 8-10 drainage holes in the bottom using a 1/4″ bit
- Smooth any rough edges with sandpaper
Drainage system:
- Place a smaller container or tray underneath to catch liquid runoff
- Elevate the main bin using bricks or blocks to allow airflow underneath
- Ensure the drainage container is easily removable for harvesting worm tea

Step 2: Create the bedding environment
Bedding preparation:
- Shred newspaper, cardboard, or coconut coir into 1-inch strips
- Fill the bin 1/3 full with dry bedding material
- Spray bedding with water until it feels like a wrung-out sponge (75-85% moisture)
- Fluff bedding to ensure proper aeration
- Add 2-3 handfuls of soil or finished compost to introduce beneficial microorganisms
pH balance:
- Test bedding pH (should be 6.0-7.0)
- Add crushed eggshells if pH is too acidic
- Let bedding sit for 24-48 hours before adding worms

Step 3: Introduce your red wiggler worms
Worm introduction:
- Purchase 1 pound of red wiggler worms (approximately 1,000 worms)
- Gently place worms on top of prepared bedding
- Cover with a thin layer of additional bedding
- Place a damp newspaper or cardboard sheet over the surface
- Put the lid on and place in a cool, dark location (55-75°F ideal)
Initial feeding:
- Wait 3-5 days before first feeding to allow worms to acclimate
- Start with small amounts of food (1/4 cup per day initially)

Step 4: Optimal placement and environmental conditions
The beauty of vermicomposting lies in its adaptability. You can create a simple system using plastic/wood storage containers or invest in a commercial multi-tray system for easier maintenance and harvesting.
Location requirements:
- Temperature range: 55-75°F (basement, garage, or kitchen pantry work well)
- Avoid direct sunlight and temperature fluctuations
- Ensure good air circulation around the bin
- Keep away from vibrations and loud noises
Moisture management:
If too wet: add dry bedding materials and improve drainage
Maintain 75-85% moisture (bedding should feel like a wrung-out sponge)
If too dry: spray lightly with water

What composting worms eat: feeding your vermicomposting system
Understanding what to feed your worms is crucial for maintaining a healthy vermicomposting system. Composting worms thrive on a balanced diet of “green” nitrogen-rich materials and “brown” carbon-rich bedding.
Excellent worm food:
- Vegetable scraps and peels
- Coffee grounds and filters (limit to 25% of total food)
- Tea bags (remove staples)
- Crushed eggshells
- Fruit waste (avoid citrus in large quantities)
Feeding schedule and amounts:
- Feed 2-3 times per week
- Provide food equal to half the worms’ body weight daily (1/2 pound food for 1 pound of worms)
- Bury food scraps 2-3 inches under bedding
- Rotate feeding locations to prevent concentrated decomposition
Avoid these items:
Onions and garlic (small amounts okay)Meat, dairy, and oily foods
Diseased plant material
Pet waste
Glossy paper
Citrus peels in large quantities
Maintenance and troubleshooting
Weekly maintenance:
- Check moisture levels and adjust as needed
- Monitor temperature
- Observe worm activity and health
- Add bedding materials as needed
Monthly tasks:
- Test pH levels
- Harvest worm tea from drainage container
- Add fresh bedding to maintain proper ratios
Common problems and solutions:
Slow decomposition: Increase worm population or reduce feeding amounts.
Foul odors: Usually indicates overfeeding or excess moisture. Reduce feeding and add dry bedding.
Fruit flies: Cover food completely with bedding and avoid overripe fruit.
Worms trying to escape: Check moisture, temperature, and pH levels.
Harvesting worm castings: timeline and methods
The vermicomposting process typically takes 3-6 months to produce finished worm castings, depending on feeding frequency, temperature, and worm population. Unlike traditional composting that can take a year or more, vermicomposting provides relatively quick results.
Harvesting methods:
Light separation method:
- Dump bin contents onto a tarp under bright light
- Form castings into cone-shaped piles
- Wait 10 minutes for worms to burrow down
- Remove top layer of castings
- Repeat until only worms remain
Migration technique:
- Push all contents to one side of bin
- Add fresh bedding and food to empty side
- Wait 2-3 weeks for worms to migrate
- Harvest castings from original side
Screen separation:
- Use 1/4″ hardware cloth to screen castings
- Worms and large debris remain on screen
- Return worms to bin with fresh bedding
Vermicomposting vs traditional composting: key differences

While both methods produce valuable organic fertilizer, vermicomposting offers distinct advantages for urban farming and small-space gardening. Traditional compost bins require more space, generate heat, and need regular turning. Vermicomposting operates at ambient temperatures, requires no turning, and produces both solid and liquid fertilizers.
The resulting worm castings also have a more balanced nutrient profile and improved water retention properties compared to traditional compost, making them a superior organic mulch and soil conditioner.
Is vermicomposting worth it? The bottom line
There are many different techniques for vermicomposting. Check out the EPAs guide on How to Create and Maintain an Indoor Worm Composting Bin for example.
For environmentally conscious gardeners, urban farming enthusiasts, and anyone interested in sustainable living, vermicomposting offers excellent value. The initial investment pays for itself within the first year through reduced waste disposal costs and eliminated need for commercial fertilizers. The premium quality of worm castings as both soil amendment and organic mulch makes this practice particularly worthwhile for serious gardeners.
Whether you’re growing herbs on a windowsill or maintaining a backyard garden, vermicomposting provides a continuous supply of nature’s best fertilizer while significantly reducing your environmental footprint. With proper setup and maintenance, your vermicomposting system will provide years of valuable organic matter for your garden while diverting kitchen waste from landfills.
The key to success lies in following proper setup procedures, maintaining optimal conditions, and being patient as your worm population establishes itself. Once running smoothly, vermicomposting becomes a low-maintenance, high-reward addition to any sustainable gardening practice.
Transform Your Space Today
Ready to vermicompost? At Painted Fern Gardening, we specialize in designing, installing, and maintaining stunning pollinator gardens that attract butterflies, hummingbirds, and beneficial insects. Our expert team understands the intricate relationships between plants and pollinators, ensuring your garden becomes a thriving wildlife habitat.

Contact us today to schedule your consultation and begin your journey toward creating an enchanting garden that will bring joy, beauty, and ecological benefits to your outdoor space for years to come.
Ready to transform your landscape into a thriving garden? Contact Painted Fern Gardening at (603) 580-3840 or visit paintedferngardening.com